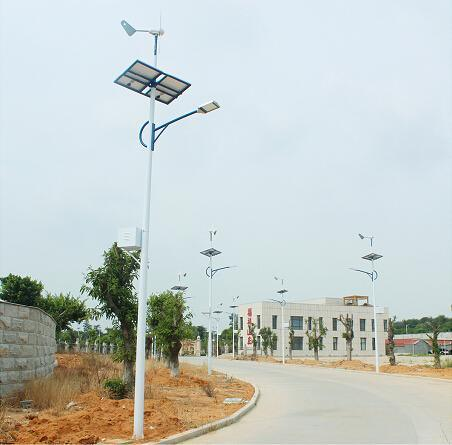
Solar street light is a new type of clean street light, with stability, safety, energy saving and environmental protection advantages, widely used in the field of public electric lighting. The installation of solar street lights is different from the installation of ordinary street lights. First, the foundation needs to be poured, and after the foundation solidifies, the solar street light components are assembled, including the assembly of solar panels and LED lights. After the assembly, the light pole is lifted, and the battery and controller are installed after the adjustment. When installing solar street lights, we should pay attention to the choice of installation position, installation time, but also pay attention to the Angle of the panel. Here’s how to install solar street lights.
Introduction of solar street light
1. Composition of solar street lights
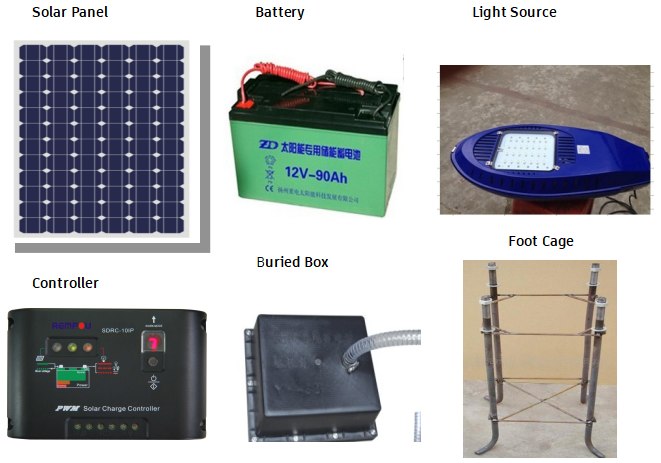
The solar street light system is composed of solar cell module, LED light holder, controller, battery and light pole. Solar street light is a kind of tool that relies on solar energy to generate heat through the panel receiving, and the controller converts it into electricity stored in the battery to light the electricity. As long as the sun is full at night, it can light up, simple installation, and does not pollute the environment, and is known as green environmental protection products. Solar street lights have the advantages of good stability, long life, high luminous efficiency, easy installation and maintenance, high safety performance, energy saving and environmental protection, economic and practical, and are widely used in the field of public electric lighting, so how to install solar street lights?

2. Application places of solar street lights
Solar street lights are most commonly used in rural areas, cities, squares, parks, scenic spots, parks and so on.
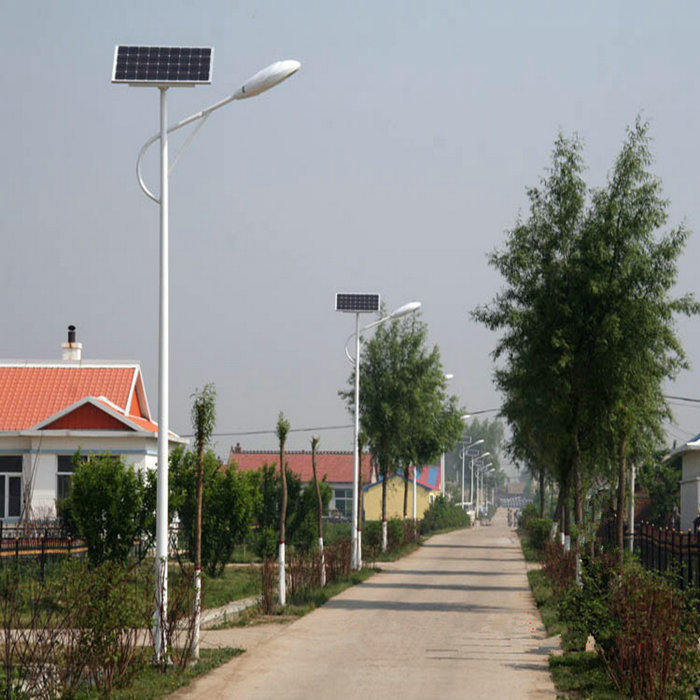
Rural roads: Generally, the street light with a height of about 7 meters can be selected. The road width of new rural construction is about 7 meters. Vehicles in rural areas, the flow of people is less, the use of unilateral interactive lighting installation, ensure that the installation spacing is about 20-25 meters.
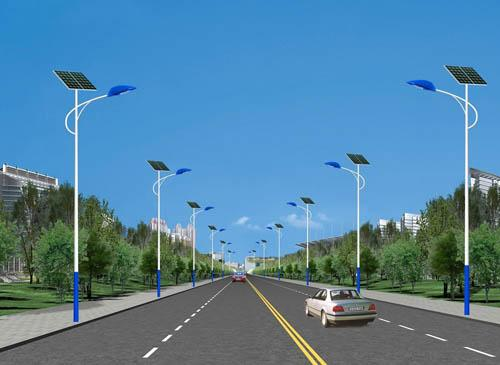
Urban road: when the width is 10-15 meters, the solar street light with 8 meters light pole is selected, and the distance between the street lights is 25-30 meters. The installation method can be cross lighting on both sides; When the width is 10-15 meters, the distance between the lights is 25-30 meters, and the height of the light pole is 8 meters. Solar street lights with a width of more than 15 meters and a pole of 12 meters can be installed in a symmetrical arrangement of lights on both sides with a spacing of 30 to 50 meters.
Preliminary preparation for the installation of solar street lights
1. the scene test, no shelter around the light. How to choose the installation position is more scientific and reasonable, whether the installation is convenient, whether there is lifting space during installation (whether there is high voltage cable around).
2. According to the requirements of the street light installation specifications, set the light position, and adopt three kinds of light distribution methods (single side light distribution, double side cross light distribution,Bilateral symmetrical cloth light); The light height is determined, and the relationship between the road width and the light distribution mode is determined. light spacing, with light height and irradiation Angle relationship (generally about three times the height of the light).
3. Determine the size of the embedded parts according to the road surface and soil quality, and determine the height of the light and the size of the embedded parts according to the data provided by the light pole factory Relationship to determine. Generally speaking, there are corresponding norms.
4. Dig the pit, determine the size of the pit according to the basic size, and reserve the storage battery burial position;
5, foundation precast, precast foundation, concrete label according to C20 to perform, at the same time to the foundation with vibration mechanism vibration tamping, to ensure the quality, when pouring concrete, pay attention to do not pour concrete on the screw, so as not to affect the installation speed. When pressing the pipe, press it according to the drawing and ensure that no concrete is injected into the pipe. The distance between the lower pipe port and the foundation surface is 250mm. Leveling the foundation surface and testing with a level to ensure the correct level of the four feet.
6. Prepare the appropriate tools according to the work requirements, and make a detailed list of materials required for installation (model and quantity, spare parts can be left in case of unnecessary trouble).
7. Prepare the appropriate materials and choose the right time.


The specific installation steps of solar street lights
1. Foundation pouring
(1) Determine the position of the vertical light; If the surface is soft soil, the excavation depth should be deepened. At the same time, make sure that there are no other facilities below the excavation location (such as cables, pipelines, etc.), and that the top of the street light does not have sunshade objects for a long time. Otherwise, change the location appropriately.
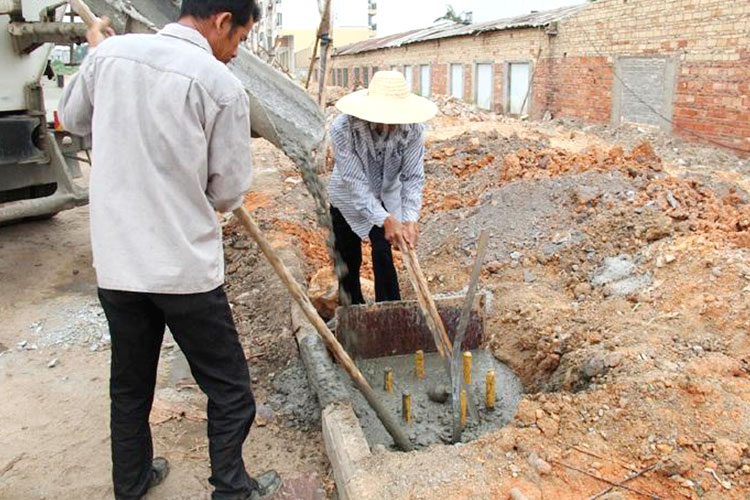
(2) Reserve (excavate) 1.3m pit in line with the standard at the position of the vertical luminaire; Placement of embedded parts is carried out. The embedded part is placed in the middle of the square pit, with one end of the PVC threading pipe placed in the middle of the embedded part and the other end in the storage battery (as shown in the figure above). Pay attention to keep the embedded parts, foundation and the original ground on the same level (or screw top and the original ground on the same level, according to the site needs), one side should be parallel to the road; In this way, it can ensure that the light pole is upright and not deflected after erection. Then, it is fixed with C20 concrete pouring. During the pouring process, vibrator should be used to vibrate to ensure the overall compactness and firmness.
(3) After completion of construction, clean the residual mud on the positioning plate in time, and clean the impurities on the bolt with waste oil.
(4) In the solidification process of concrete, it is necessary to water and conserve regularly; When the concrete is completely set (generally more than 72 hours), the chandelier can be installed.
2. Installation of solar cell modules
(1) Before connecting the output positive and negative terminals of the battery module to the controller, measures shall be taken to avoid short connection;
(2) The solar cell module should be firmly and reliably connected with the support;
(3) The output line of the component should avoid exposure and be tied firmly with cable ties;
(4) The orientation of the battery module should face due south, and the compass point shall prevail.
3. Battery installation
(1) When the battery is placed in the control box, handle it gently to prevent damage to the control box;
(2) The connecting wire between the battery must be pressed on the terminal post of the battery with bolts and copper gasket is used to enhance the conductivity;
(3) After the output line is connected to the battery, it is forbidden to short-circuit the battery in any case to avoid damage to the battery;
(4) the output line of the battery and the controller in the pole must be connected through the PVC threading pipe;
(5) After the completion of the above, check the wiring of the controller to prevent short circuit. Close the door of the control box after normal.
4. light installation
(1) The assembly of each part is fixed: the solar panel is fixed on the solar panel bracket, the light holder is fixed on the pick arm, and then the bracket and pick arm are fixed to the main rod, and the connecting line is led to the control box (battery box).
(2) Before lifting the light pole, check whether the fasteners of each part are firm, whether the light holder is installed correctly, and whether the light source works normally. Then in the simple debugging system work is normal; Loosen the solar panel connection wire on the controller, light source work; Connect the solar panel connection wire, light off; At the same time, carefully observe the change of each indicator light on the controller; If everything is normal, it can be lifted and installed.
(3) Pay attention to safety precautions when lifting the main light pole; Absolutely fasten the screws, such as component toward the sun Angle deviation, need to adjust the upward direction of the sunrise completely due south.
(4) Put the battery into the battery box and connect the connecting line to the controller according to the technical requirements; First connected to the battery, then connected to the load, and then connected to the sun plate; When wiring operation, we must pay attention to the wiring and the terminal marked on the controller can not be wrong, positive and negative polarity can not collide, can not be reversed; Otherwise, the controller will be damaged.
(5) Whether the debugging system works normally; Loosen the solar panel connection wire on the controller, and the light will be on. Connect the solar panel connection wire, light off; At the same time, carefully observe the change of each indicator light on the controller; If everything is normal, the control box can be sealed.
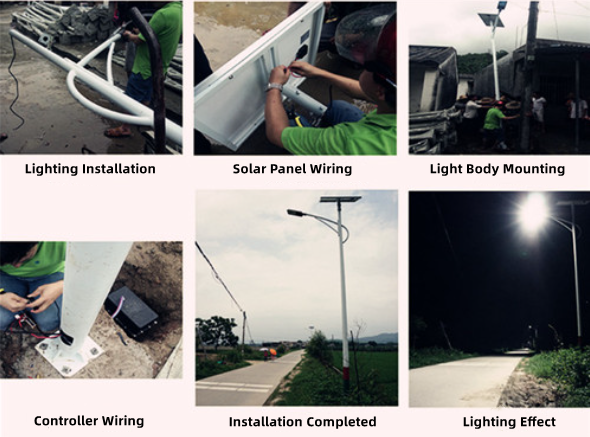
Congratulations! You have now successfully installed your solar street lights. Please follow the installation instructions and safety instructions strictly to ensure the successful installation of the solar street lights.

